Tutorials

Sunday, September 6, 2015

RUFFLED

Hi Friends,

      Its been a long time, I know am such a lazy blogger, and I keep repeating it over and over without any improvement, lol...... you just have to take me as I am, have been so preoccupied with a lot of things recently.
   

Saturday, August 1, 2015

Russian Spiral/Four line Spiral


        Russian Spiral and four line spiral  are designs with different bead weaving technique. Both designs are usually appealing. The appearance of the designs changes depending on the shapes and sizes of the beads you select.
      Russian Spiral is a variant of tubular netting, its a very good stitch for beginners, its easy to learn and it stitches up very quickly.
   By mixing and matching colors you will be able to use the bead weave patterns for any project you please.

      There have been argument among beaders in recent times about the difference between Russian spiral and Four line spiral, most people doesnt know the difference, some even confuse the two for each other, Russian spiral and Four line spiral are very identical, you cant even tell the difference some times, especially if Russian spiral is the same counting with Four line spiral.

       In Russian spiral, the beads used both the dominant ( smaller beads beads) and the non- dominants ( the bigger beads)which  are closely packed together.

       The Four line spiral  design as the name implies, four strands of fishing line are used.

         Am quite familiar with the two identical stitches, have done a quite number of spirals using the two stitches,  having studied the stitches,  I prefer working with Russian spiral, I realize that Russian spiral is less stressful unlike four line spiral that requires all your energy,   most times four line spiral easily get muddled up cause of the use of four line, it get tangled sometimes, the use of the four line might even get someone confused, making you pick the wrong fishing while working. its much stressful than Russian spiral at the same time a funny design,in the sense that two fishing line are kept in your mouth and the other two fishing lines  are kept in hand for a start but as time goes on, you will have  to work with both hands and legs.

   Russian spiral is a versatile stitch,  it can accommodate any number of beads, you can change the way you want it to look like, you can decide how big you want your spiral to be, by increasing the numbers of beads in the base row, that is not the same for four line spiral, it has a certain number of beads required for each step, any other counting apart from the required one will give you a loosed and ugly spiral work. 

Here is a Tutorial on Russian spiral. 
Materials Needed:
1.  Size 1 seed beads.            A
2.  Size 6 crystal beads.        B
3.  Beading Needle.
4.  0.30 fishing line.

******I will refer to the beads as A & B respectively*********
All beading supplies are available at any bead shop near you.


1. Cut a comfortable Fishing line and attach your beading needle. 
2.  Pick up 1A bead and 1B bead, three times respectively,  slide them down to the end of the fishing line.
3. Stitch through all the beads to form a ring. 
4. Exit from one of the A beads, Pick up 1B bead and 5A beads, and stitch your needle through the next A bead in the ring.
5.  Repeat step 4.
6.  To step up, pick 1B bead and 5A bead, then stitch your needle into the first A bead after the B bead picked in step 4.
7.  keep picking 1B bead and 5A beads and stitch through the first A bead after the B beads in the previous step till you have your desired length.

For tutorials on Four line spiral, click here


Here are some Russian spiral designs:


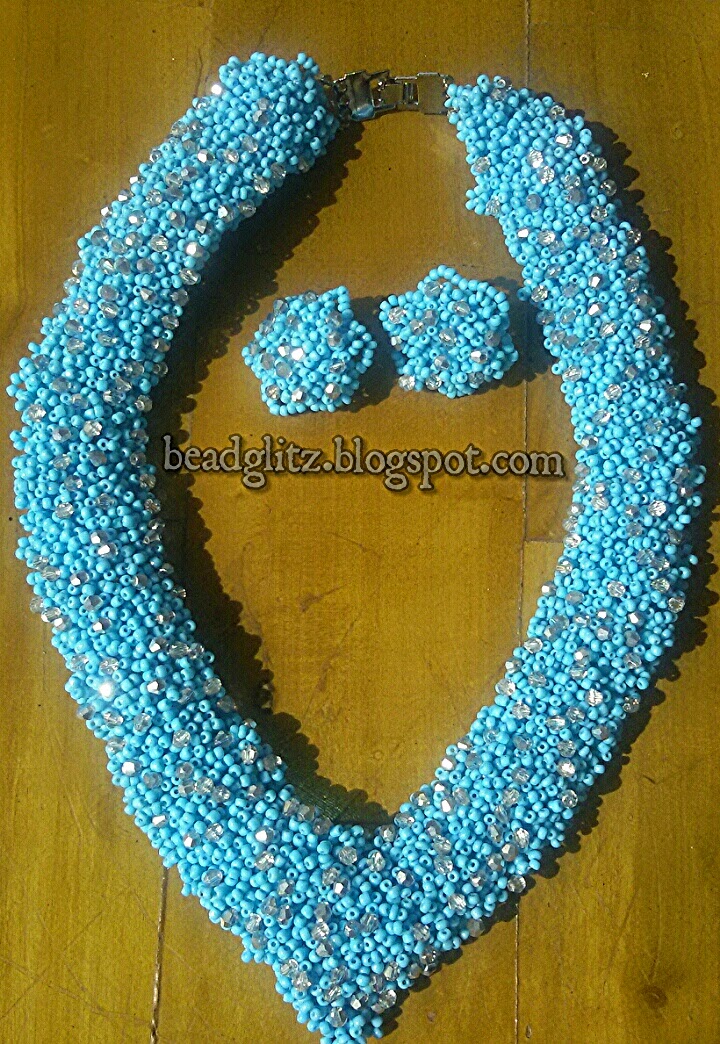
Neck bead is Russian spiral, the earrings is made with four line.


Here  are some designs done with Four line.


There are really no difference between the two stitches. 


Do you prefer Russian Spiral to Four line spiral? state your reason in the comment section.

                               Happy New month,  
                                      Tomisin.

Wednesday, July 1, 2015

Happy New month!!!! Think it...Dare it....Do it.....Bead it.

Happy New month my dearest beaders, 

     Open your Mind to Possibilities and You’ll be amazed by what you are capable of achieving. We are powerful beyond measure. May the Almighty God balance the equation for you and me this new Month and the Lord shall make everything perfect in your life. May almighty father bless us with More creative ideas, success, blessing, joy, happiness, favour, grace and greatness in all of our endeavour,  I welcome you into the month of July. The month of perfection, financial fortune and uplifting.

Sunday, June 14, 2015

Look beyond Macrame......Think beads

           A friend posted some beautiful bags made with twines and cord in a beading  Watsapp group which I belong to, everybody was thrilled, I was Very surprise, how on earth can you make such beautiful bags with twine and cord, am so amazed that a simple knot can make beautiful and interesting things, so I decided to research more on it, and I realised that we can also make this knots with beaded ropes too.

    Macrame is the art and craft of tying cords into knots in such a way that they form a useful or decorative shape,  macrame can be tried by anyone with passion to create with little or no experience,  its an old craft work that can be traced back to early fourteenth century, this same old knotting craft done with twines and cords is making a dramatic come back in our beaded Jewelry,  all you just need is to master the simple knot techniques. 

    I wont be writing tutorials on how to make knots, I just want you to know that you can do anything if you put your heart to it,  just watch out for those tiny little sparks of inspiration, I was inspired by macrame knotting technique to make this neckpiece, its so simple,  I make my beaded rope and I made use of the lark head knotting pattern to make my knot, see the picture after the cut.

Friday, June 5, 2015

Beaders Feedback


*******Thousands of candles can be lighted from a single candle,  and the life of the candle will not be shortened,  talents and creativity never decreases by being shared.********

Thursday, June 4, 2015

Tutorial: Single St Petersburg chain

Goodmorning lovelies,

     Here is my gift to you this morning, a simple tutorial on St Petersburg stitch, The versatile stitch comes in a single chain,double chain, and Russian eyelets. Today we will be learning  how to make a single chain into a necklace with a Vee at the middle.

Tuesday, June 2, 2015

Four ways you can wear your spiral rope


Goodmorning Lovelies, 


I know by now many of you are already familiar with spiral rope, if not click here for the tutorial on spiral rope, I hope the smile on my face will brighten your day, do have a nice day and remain blessed. 

Monday, June 1, 2015

Great Beaders Around the world - SONOKO NOZUE

Goodmorning friends, 

   While surfing the internet this morning I stumbled on a great Japanese beader SONOKO NOZUE, she took my breath away with her awesome and beautiful beadwork,  I appreciate God for the talent he has bestowed upon her, and Japanese beaders in general,  they are really trying.

SONOKO NOZUE


According to Amazon.com

     Sonoko Nozue was Born in Tokyo in 1945, she resides in Japan.
Graduated from the College of Humanities and Science, Nihon University, in 1968, with majors in Japanese and Japanese literature.
She Began teaching bead classes in Nagoya in 1995.
She's the President of Bead Salon Sonoko, a group whose activities include organizing workshops taught by the author, producing commissioned beaded pieces for special exhibitions, and participating in events that promote beading in Japan and stimulate interest in this field.
In 2006, became the first foreign instructor at the Bead&Button Show. Since then, has attended this event every year. Her beadwork won the Bead Dreams Finalist in the Seed Beads Wearable category in both 2005 and 2007.
She Taught at Bead Art Show Kobe in 2006, and Bead Art Show Yokohama in 2007. In the same year, taught the workshop "CREATE YOUR STYLE with CRYSTALLIZED™ - Swarovski Elements" at the Japan Hobby Show.
She Served as a judge for the Bead Grand Prix competition sponsored by Yomiuri newspaper and the Japan Art Accessories Association.
Supervised the bead crochet correspondence course taught by the Japan Art Accessories Association.

Sonoko Nozue wrote Japanese Beadwork with Sonoko Nozue: 25 Jewelry Designs from a Master Artist it was published by lark crafts in 2012.

 Here are some of her beautiful beadworks and also the front cover of   Japanese Beadwork with Sonoko Nozue, see them after the cut.


Friday, May 29, 2015

INTRO-DUCING GLITZ LEAVES


DESIGN NAME: Glitz leaves.
TYPE OF STITCH: St Petersburg stitch and spiral rope. 
COLOUR: Red and Gold. 
TYPE OF BEAD USED: Size 2 seed bead.


What do think about this awesome design? 
Dont forget to leave a comment.

Happy Beading, 
Tomisin.   


Monday, May 25, 2015

Hiiiiiiiii


        It's been a while, it's not that I am not beading, just an awful lot to do and not enough time, besides am battling with so many things here. 

   
My beading table is so filled up with a lot of project, you know how greedy I can be with bead projects, jumping from one project to another without completing one.

        Been playing around with a couple of stitches lately,  especially the ever versatile peyote stitch, I tell you, the possibilities with peyote stitch are endless.  Trying to bezel my cabochons, using peyote stitch,   I hope it came out fine.

    On my last post about my beading table,  I told you I was making some peyote/herringbone triangles, am through with it, but I didnt make it into a necklace,  I turned it into a brooch, still dont know what neckpiece to attach it too.
Lol...how come I have a gold colour in my brooch, I guess every mistake
is a design. 

     I have some leaves on that table,  ready to be  attached to a spiral rope,  made 35 leaves, it took me 3 days to make those leaves (laziness.....lol), it wasn't easy, I must tell you,  doing the same thing over and over again, it was tiring and I hate it, I hope it will come out fine when I get to put them together, "it better be fine...lol" .


So what are you making right now? 
Share your project with me on my facebook page  BEADGLITZ NG 
Thanks to those that have shared, it really means  a lot to me.


Happy beading,
Tomisin. 

Monday, May 11, 2015

My beading Table


Good day everyone, 

        It's been a long time, so sorry about my style of blogging, very slow, as many people have pointed it out to me, its due to a lot of reason, am so sorry, I guess am pardoned.  
       So I got this beautiful beads on my table, Yellow and Black size 3 seed beads, and am making this awesome design with it, herringbone/Peyote Triangle, am going to be making three of them, and I want to make them into a necklace,  although I have no idea how am going to do that, maybe I will just suspend them on a herringbone collar.  I just hope its going to be beautiful,  I have no doubt about that though. 

What's on your beading table right now? 

Tuesday, April 28, 2015

TUTORIAL: SPIRAL ROPE


    Spiral rope stitch is one of the most versatile stitches we have, very simple to make, if I must say and unique in its own way. It can be used for necklace, bracelet, even bag straps.
    There are so many variation you can use that make it looks different every time.

The basic spiral rope is made up of two section, the core, and the outer spiral rows which wraps around the bead.

MATERIALS:
1. Size 3 seed bead which is the core bead.
2.  Size 2 seed bead which  is the outside bead.
3.   0.25 fishing line.
4.  Beading Needle. 

PROCEDURE:
1. cut a comfortable length of fishing line, insert a stop bead and a needle, leaving about six inches tail.
2.  pick up four core bead and four outside bead.

3. Stitch up your needle through the four core bead, and pull snug.
    

4.  pick up one core bead and four outside bead.
5.  Stitch your needle up through three of the core beads from the previous step and the new core bead just added, pull snug.

6. Use your thumb to push the new outside beads over to the side so that they rest next to the first set of outside beads.

7. Repeat from step 4, untill you reach your desired length. 


    like I said earlier, there are so many variation of Spiral rope stitch,  for this particular variation, ( see the picture after the cut)

Thursday, April 23, 2015

OWANBE: RAW COLLAR

    She called me yesterday,  she wants a very beautiful and unique piece for OWANBE, and she will be making use of it today,   wow!!! how am I going to do that, all the unique designs I know are time consuming, how am I going to give her the best within this short time, "hmmmm"  after thinking for a while, I settled for this RAW COLLAR.
See it after the cut,

Wednesday, April 15, 2015

CELLINI SPIRAL TUTORIAL


    Cellini spiral is a variation of tubular Peyote, where different size and colour of beads are used to create a spiral effect.

    Just by changing the arrangement of the beads the possibilities are endless, its always very hard at first, because a lot of beads and patience are always needed to create something unique.

     To stitch a Cellini spiral, you need to determine a pattern for your spiral, you can use any combination of seed bead, in any size and colour you want, once you have your first row ready, the rest of the stitch is very straightforward.

     Yay!!! Finally I finished my Cellini spiral design,  I eventually made it into a bracelet,  "biko no be everything we dey put for neck" ...lol... our hands need to do the talking too.


    For this particular pattern you will need:

1. Size 1 seed bead (pink)                          A
2. Size 2 seed bead (light blue & deep blue) B &C
3. Size 3 seed bead (light blue)                        D
4. 0.25 fishing line.
5. Beading needle.

Procedure:

1. Attach a needle to a comfortable length of fish line.
2. Pick up the beads in this sequence:
6A + 4B + 2D + 4C.
3. Tie them in a circular shape at the end of the fish line leaving about a 6 inch tail, tie it three times.
4. Stitch through two of the A beads, you must begin your spiral here.
like any other peyote stitch technique, you pick up a bead, skip a bead in the base row, and stitch through the next bead,  you need to do this round the base row, skipping the next bead till the end.
There’s no need to count bead or stitches, just remember to always pick up the same type of bead your fishing line is exiting through.
     After you have added the last bead of that first peyote row, you will need to step up, stitch through the first raised bead, which is also the first bead you picked up in the last round.
   Gently push your beadwork into a tube shape, after the third round, also, do not try to bend your beadwork to get a curve, any tubular beadwork will appear very rigid when it is short,  but it will become more flexible as you add length, when it's long enough,  you will be able to bend it easily.

Here are some other combinations you might like to try:
6A + 2B + 2D + 2B + 2D
6A + 4B + 2D4 + 2B


While surfing the net, I saw some really beautiful designs of cellini spiral,  see them after the cut:

Tuesday, April 7, 2015

AM THE BADDEST PHOTOGRAPHER

*****The normal saying is "a picture is worth a thousand words", but now in this social media age " a picture is worth a few hundred likes, a couple of comments, and a handful of retweets and shares"****


      Good morning guys, how was the Easter celebration, mine was fantastic, although I spent the holiday at home working on a beadwork "beaded curly fur", except for the fact that I went to church on Sunday morning, I was home for the rest of the day and also on Easter Monday.


Saturday, April 4, 2015

HAPPY EASTER

***May the good lord bless you on this day and may it be a new beginning of greater prosperity, success and happiness, I wish you all a happy Easter celebration.***


At the cross I bow my knee
Where your blood was shed for me
There’s no greater love than this 
You have overcome the grave
Glory fills the highest place
What can separate me now?
                       These are lyrics from a song by Hillsong.

        The celebration of Easter marks the cultural idea of remembering our redemption from sins, it’s the day we celebrate the resurrection of Jesus Christ from death, a time in a Christian life to remember Christ’s eternal  gift.


       As a way to celebrate and remember all that Christ did for me, I made this beaded crosses, using cubic RAW beading. This beaded cross is a special craft for the Easter season, you can use them as charms, pendants or earrings, key chain ornaments ,and  it can also be worn all year long as a proclamation of faith, you can also give it to a friend as a gift for the season. 
     Happy Easter,
            Stay creative,
    Tomisin .

BEADED EASTER EGG


  As a catholic that grew up in the western part of Nigeria, Easter period is like a mourning period in our church, and also in our house.  We celebrate the life, death and resurrection of Jesus, beginning with the season of  lent, a forty- day period of abstinence and mourning, then end it on Easter Monday, which is the accession of Christ into heaven, it has been the same ritual every year.  Then I noticed the use of Easter bunnies and colorful decorated Easters eggs to celebrate Easter in some certain culture in the world, I was very confuse about the significance of Easter bunnies and Easter eggs but am more enlightened now and I really wish we can incorporate that in our culture.

The practice of decorating Easter eggs is a tradition shared by many cultures around the world, from children using vegetable dye to decorate eggs, to professional artists creating beautiful designs.  The egg is a symbol of creation, spring and fertility in many cultures and religions, its seen as a source of new life, for just as a hard shell of the egg is broken open so that new life can emerge, so was the rock- hewn tomb of jesus broke open when he rose from the dead on the third day.

  According to Wikipedia, Easter eggs, are also called Paschal eggs, they are decorated eggs that are often given to celebrate Easter or springtime. As such, Easter eggs are common during the season of Eastertide (Easter season). The oldest tradition is to use dyed and painted chicken eggs, but a modern custom is to substitute chocolate eggs, or plastic eggs filled with confectionery such as jelly beans. Eggs, in general, were a traditional symbol of fertility, and rebirth In Christianity, for the celebration of Eastertide, Easter eggs symbolize the empty tomb of Jesus, though an egg appears to be like the stone of a tomb, a bird hatches from it with life; similarly, the Easter egg, for Christians, is a reminder that Jesus rose from the grave, and that those who believe will also experience eternal life.
  While the origin of Easter eggs can be explained in the symbolic terms described above, among followers of Eastern Christianity the legend says that Mary Magdalene was bringing cooked eggs to share with the other women at the tomb of Jesus, and the eggs in her basket miraculously turned bright red when she saw the risen Christ. The egg represents the boulder of the tomb of Jesus.

As a way of celebrating Easter this year I made these lovely beaded eggs, I even made them into a necklace.

Have a fun filled Easter with lot of colours to brighten your day. 
Click here,here,here, and here for my gift to you this day. 
                            Tomisin.


Thursday, March 26, 2015

AM SO LAZY


I  don't know if it's me, or it happens to everybody, I just realize I have so many unfinished projects, this is caused by a lot of factors, ranging from lack of time, difficulty in the techniques involved, and this thing of having to keep repeating one step over and over again…very boring.


TUBULAR PEYOTE:

This one is tubular peyote, which I started like two weeks ago, I plan to make it into a necklace, the design is made with size 2 seed bead, I so much love the way I use the multicolour beads to make a rhombus shape around the beadwork.

AFICAN HELIX:

This traditional African stitch closely resemble a DNA , one characteristic of the African  helix are the raised beads called "piping", the piping creates the design for the African Helix stitch, you use a different colour of bead for the piping and it will create that spiraling effect on the beadwork.

You can either use seed beads throughout or you use seed bead and bugle bead. For this particular one I use size 1 seed bead and bugle bead, I use the seed bead for the piping.

click here for African Helix tutorial

CELLINI SPIRAL:

Cellini spiral is a variation of tubular peyote, where different size and colour of beads are used to create the spiral effect, for this particular one,  I use two different shades of blue and pink colour, I so much love  the colours and the spiral effect, it looks like a snail shell.

It's taking me eternity to finish my Cellini spiral, have abandoned it for more than six months, I just can't wait to finish it.

RAW CHAIN LINKS:

Am seriously tired of this design, and I really want to finish, so I can show off my hard work, have abandoned it for like three months now, I don't mind if someone can help me out on this.

I made multicoloured tubular right angle weave (RAW), and stitched the ends together to form a ring, I have eleven (11) rings right now, I think I need like seven (7) more. I hope to make a bracelet out of this particular stitch, but I have to finish this one first.


I know I may not be an expert, but I like to share what I can do.

What's that stitch that's been giving you tough time?


Tutorial: African Helix


Hi Friends:
I prepared this tutorial based on a request. You really have to forgive me, I won’t be posting any pictures,  I hope you will make do with only the written instructions, trust me, it’s very simple if you follow it closely.
You can either use seed bead and bugle beads, or you use seed beads throughout, if you want to use seed beads only, you will need two colours of seed bead,  all you just have to do is to substitute the bugle bead for seed beads,  like 3-4 seed beads.

Materials: 
1. Size 1 seed bead. 
2. Bugle bead.
3. 0.25 fish line.
4.  Bead needle.


Procedure:
1. Insert a needle to a comfortable length of fish line.
2. Insert one seed bead and one bugle bead, three times simultaneously, slide them down to the end of the fishing line, leaving about six inch tail.
3. Stitch through all the beads to form a triangle shape, your fishing line should exit from a seed bead.
4. Pick a seed bead and a bugle bead.
5. Pass the needle into the nearest seed bead in the triangle.
6. Repeat from step four (4).
Note: You can gently push the beadwork into a tubular shape, make sure you are stitching your needle through the raised seed bead.


Feel free to share your finished project on my facebook page, @beadglitz ng.


                                Happy beading,
                                     Tomisin. 

Tuesday, March 17, 2015

WISH UPON A STAR (TUTORIAL)


"When you wish upon a star your dreams come true"
The saying comes from the belief, when you see a shooting star in the sky at night, any wish you make would be granted. Sounds very  funny,  lol....

"When you wish upon a star
 Make no difference who you are
 anything your heart desires
 Will come to you.

 If your heart is in your dream 
 No request is too extreme
 When you wish upon a star
 As dreamers do."
                    Leighton Harline,  Ned Washington. 

Fellow beaders, 
       A dream is a wish your heart makes, and every wish is a prayer and a direct flash of positive thinking. So don't hesitate to wish and pray for something positive today, because that shooting star might just be your lucky star.

Back to business, lol.....

today I wish to make a beaded star.

Beaded stars are fun to make and it's very easy,  you can use them as earrings, pendants,  charms, key chain ornament, you can even string them together to make a bracelet or necklace. 

Bellow are the materials we will need to make a beaded star.


1.  Size 3 seed bead.
2.  0.30/0.35 fishing line.
3.  Beading needle.
4.  Scissor

Procedure:
1. Thread a needle to a comfortable length of fishing line.
2. Pick up 10 seed beads
3. Stitch through them to form a circular shape at the end of the fishing line, leaving about a 6 inch tail. 

4. pick up 5 seed beads, skip a bead in the ring, then stitch your needle through the next bead, it will form a loop.


5. Repeat step 4 all the way round.

6.  Stitch up through 2 beads At the first loop.

7.  skip the third bead in that loop and go through the remaining 2, this will make Your star tip stand out more sharply.

8. Go through the bead in the main ring, and repeat step 6 and 7 for the remaining loops.
9. secure both fishing line and cut.

hope you've enjoyed this, Do come back to see more from me.

Make your's today and share with me. 
                                                    Tomisin.